 how-to
How to Fix Sewing Machine Tension: Step-by-Step Guide
Table of Contents
- Understanding How Sewing Machine Tension Works
- Sewing Machine Tension Troubleshooting: Diagnose Your Problem
- How to Tell if Sewing Machine Tension Is Correct
- Fixing Sewing Machine Thread Looping Underneath
- Sewing Machine Tension Settings for Quilting
- Step-by-Step Tension Adjustment Process
- Identify Your Machine Type First
- Step 1: Clean and Inspect Before Adjusting
- Step 2: Raise the Presser Foot Before Threading
- Step 3: Rethread Your Machine Correctly
- Step 4: Test on Scrap Fabric (Same Setup as Your Project)
- Step 5: Make Small Upper-Thread Tension Dial Adjustments
- Step 6: Check Bobbin Setup and Winding (If Upper-Thread Adjustment Doesn't Fix It)
- Step 7: Bobbin Case Tension Adjustment (Last Resort, Machine-Specific)
- Common Mistakes to Avoid
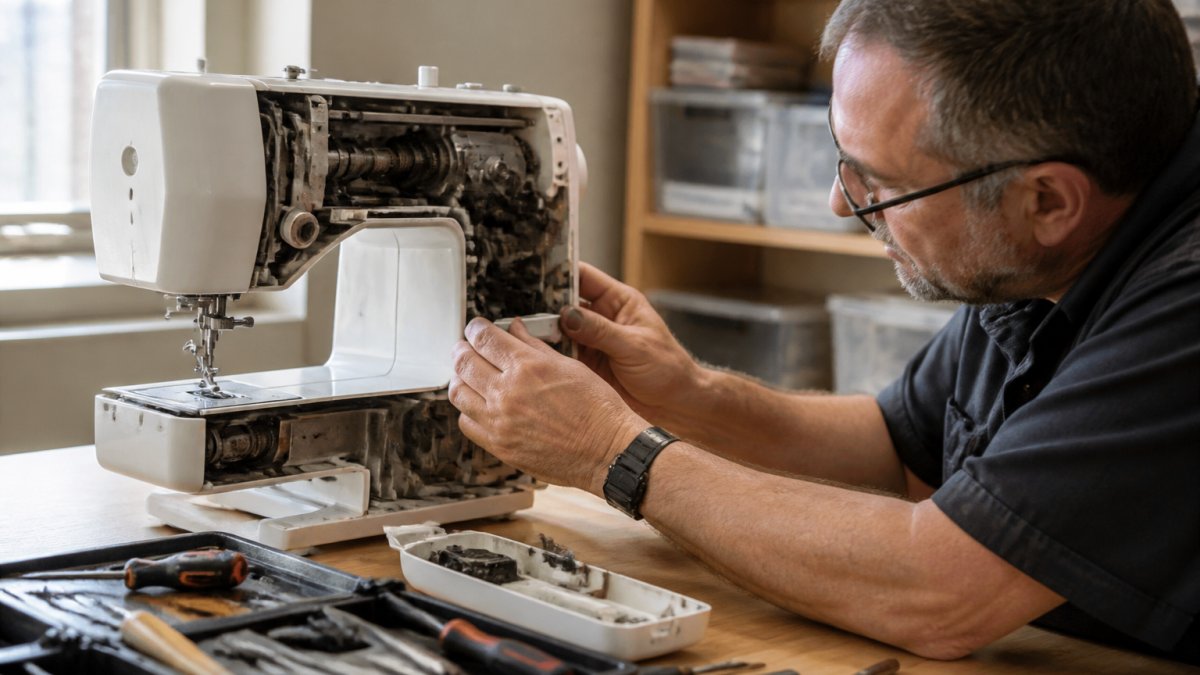
- When to Stop Troubleshooting and Seek Repair
- Frequently Asked Questions
Last Updated: October 10, 2026
Understanding How Sewing Machine Tension Works
Sewing machine tension controls how tight or loose the thread pulls through your fabric. Your machine has two thread sources: upper thread from the spool running through tension discs, and bobbin thread underneath. When they meet inside the fabric, they lock to form a stitch. If tension is off, one thread pulls harder and stitches fall apart.
Sewing Machine Tension Troubleshooting: Diagnose Your Problem
Match your symptom to the most likely cause below. Work through checks in order; most tension problems are threading, bobbin, or maintenance issues.
Symptom-to-Cause Troubleshooting Chart
Bobbin thread visible on top of fabric (loops or thread showing)
- Most likely cause: Upper-thread tension too loose
- Secondary causes: Upper thread not fully seated in tension discs; presser foot was down during threading; thread skipped a guide
- Check first: Rethread the machine with presser foot raised; inspect tension discs for lint or stickers; verify thread path in manual
Upper thread visible on bottom of fabric (loops or thread showing)
- Most likely cause: Upper-thread tension too tight
- Secondary causes: Bobbin wound unevenly or too loosely; bobbin case tension spring too tight; bobbin not fully inserted
- Check first: Inspect bobbin winding (should be smooth and full); verify bobbin case is inserted completely; check that bobbin thread passes through the tension spring
Fabric puckers or bunches along seam line
- Most likely cause: Upper-thread tension too tight; OR fabric is being pulled unevenly
- Secondary causes: Needle bent or dull; presser foot pressure too high; thread too thick for needle size
- Check first: Replace needle with a fresh one; verify needle size matches thread weight; test on a single layer of scrap fabric
Thread breaks during sewing
- Most likely cause: Needle bent, dull, or inserted backward; thread caught or frayed; tension too tight
- Secondary causes: Lint or debris in tension discs or needle area; bobbin case damaged; thread spool has a snag or burr
- Check first: Replace needle; inspect spool for snags; clean tension discs and bobbin area with a small brush
Stitches are uneven (some tight, some loose)
- Most likely cause: Inconsistent thread feeding; bobbin wound unevenly; machine not moving fabric smoothly
- Secondary causes: Presser foot pressure too light; feed dogs clogged with lint; needle bent
- Check first: Clean feed dogs and bobbin area; replace needle; verify presser foot pressure is set correctly
Stitches look balanced but thread breaks or skips
- Most likely cause: Needle damaged, dull, or wrong size; thread quality issue; tension discs damaged
- Secondary causes: Bobbin case burr or damage; lint in needle area
- Check first: Replace needle with a new one; inspect bobbin case for burrs; clean needle area thoroughly; try a different thread brand
Recognizing Loose Tension
When your upper-thread tension is too loose, the upper thread sits slack on the fabric surface and you'll see loops of bobbin thread pulling through to the top. The bottom looks relatively normal, but the top looks messy and weak. Test this by looking at the underside of your work. If the bobbin thread is visible on top but the top thread looks fine underneath, your upper-thread tension is too loose, but verify your threading and bobbin setup first before adjusting the dial.
Recognizing Tight Tension
When your upper-thread tension is too tight, the upper thread pulls so hard that it yanks the bobbin thread toward the top. Your fabric may pucker or bunch, and the bottom shows loops of upper thread. Puckering is the big red flag here. Always check the needle and threading path before adjusting the tension dial.
How to Tell if Sewing Machine Tension Is Correct
Balanced stitches look the same on both sides of your fabric. The thread interlocks exactly in the middle of the fabric layers. Test on a piece of scrap fabric using the same thread and fabric type you'll use for your project.
A correctly tensioned stitch has these qualities:
- Even appearance on top and bottom
- No visible loops on either side
- No puckering or bunching
If your test stitches look balanced, your tension is fine. If not, you need to troubleshoot.
Fixing Sewing Machine Thread Looping Underneath
This is the most common complaint: you see loops of thread on the bottom of your fabric. Before you adjust anything, work through this checklist.
Check Your Threading First
Nine times out of ten, looping underneath means your machine isn't threaded correctly. The upper thread must follow the exact path your machine manual shows.
Rethread your machine from scratch:
- Raise your presser foot (this opens the tension discs)
- Remove the bobbin case or open the bobbin compartment
- Take out all thread
- Follow your manual's threading diagram exactly
- Make sure the thread sits fully in each guide and tension disc
- The thread should make an audible click when it enters the tension discs
Most threading mistakes happen at the tension discs. The thread must sit between both discs, not just rest on top of one.
Inspect the Presser Foot and Tension Discs
Raise your presser foot and look at the tension discs. They should be clean and free of thread fibers, lint, or stickers from new thread spools. If you see lint or a sticker, use a small brush or compressed air to clean it out. Never force anything between the discs. Also check that your presser foot itself isn't bent or damaged.
Adjust Upper-Thread Tension
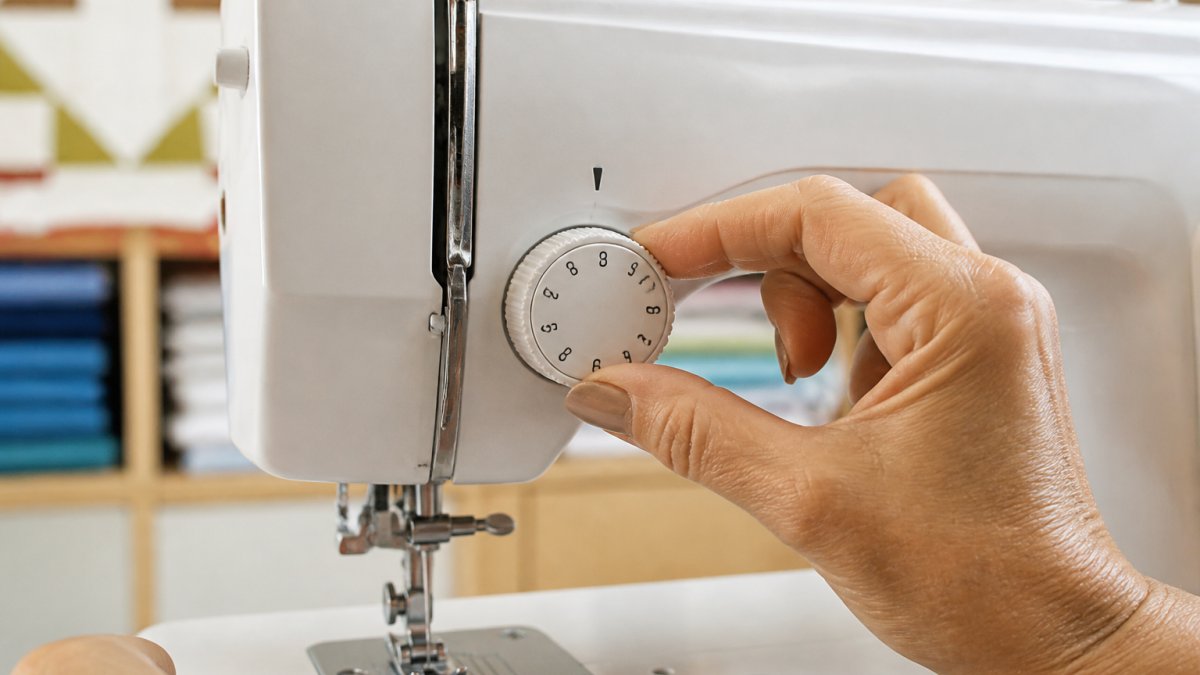
Only after you've checked threading and presser foot should you adjust the tension dial. The dial usually has numbers from 0 to 9, with 4 or 5 as the standard setting.
Make small adjustments:
- Turn the dial one number at a time
- Test on scrap fabric after each change
- Go clockwise to tighten, counterclockwise to loosen
Write down what number works for your current thread and fabric combination. Different thread weights need different settings.
Sewing Machine Tension Settings for Quilting
For piecing (sewing fabric pieces together), use a balanced tension around 4-5. For quilting (stitching through layers), you may need slightly looser tension than piecing.
If you're using monofilament thread (invisible thread), loosen your tension further. Start at 2-3 and work up if needed.
Always test on scrap fabric that matches your project, same number of layers, same thread type.
Step-by-Step Tension Adjustment Process
Follow this sequence to fix sewing machine tension safely and systematically.
Identify Your Machine Type First
Bobbin and tension-access design varies by machine.
Front-loading bobbin machines (most modern machines)
- Bobbin inserts into a removable case on the front or side
- Bobbin case has its own small tension spring screw
- Upper-thread tension dial is on the front face
Top-loading bobbin machines (some older and computerized models)
- Bobbin drops straight down into a shuttle or case under the presser foot
- No removable bobbin case; tension spring is built into the machine
- Requires raising the presser foot and sometimes removing the needle plate to access the bobbin area
Drop-in bobbin machines (some computerized and modern machines)
- Bobbin sits in a small compartment; no separate case
- Tension is controlled entirely by the upper-thread dial
- Bobbin case tension should never be adjusted
Computerized machines
- May have automatic tension adjustment or a digital display
- Some models lock the tension dial or require a menu setting
- Check your manual before attempting adjustment; some machines require a technician
If you're unsure of your machine type, check your manual or look up your machine model online.
Step 1: Clean and Inspect Before Adjusting
Lint, thread fibers, and debris in the tension discs, bobbin area, and feed dogs can mimic or worsen tension problems. Cleaning often solves the issue without any dial adjustment.
Clean the tension discs:
- Raise the presser foot (this opens the discs)
- Use a small soft brush or compressed air to gently remove lint and thread fibers from between the tension discs
- Never force anything between the discs or use a sharp tool
Clean the bobbin area:
- Remove the bobbin and bobbin case (if your machine has one)
- Use a small brush or compressed air to remove lint from the bobbin compartment, feed dogs, and around the shuttle
- Wipe the bobbin case gently with a lint-free cloth
Inspect for damage:
- Look at the tension discs for corrosion, scratches, or visible damage
- Check the bobbin case for burrs, dents, or scratches
- Verify the presser foot is not bent or damaged
If you see corrosion, deep scratches, or bent components, your machine likely needs professional service.
Step 2: Raise the Presser Foot Before Threading
This is non-negotiable. The presser foot opens the tension discs. If you thread with the presser foot down, the thread can't enter the discs properly.
Always raise the presser foot before threading your machine.
Step 3: Rethread Your Machine Correctly
Remove all thread and start fresh. Follow your manual's threading diagram exactly. Pay special attention to the tension discs, thread must sit between both discs, not just rest on top.
Step 4: Test on Scrap Fabric (Same Setup as Your Project)
Cut a piece of fabric similar to what you'll be sewing. Use the same thread type, weight, and color. Use the same needle size and type.
For quilting or multi-layer projects, stack the same number of fabric layers as your actual project.
If the stitches look good, you're done. If not, move to the next step.
Step 5: Make Small Upper-Thread Tension Dial Adjustments
Turn the dial one number at a time. Test after each change. If you see loops of bobbin thread on top, loosen the upper-thread tension (turn counterclockwise).
Make one change, sew a test line, check both sides, then adjust again if needed.
Write down what number works for your current thread and fabric combination.
Step 6: Check Bobbin Setup and Winding (If Upper-Thread Adjustment Doesn't Fix It)
If adjusting the upper-thread tension doesn't fix the problem, the issue may be your bobbin.
Check these:
- Is the bobbin wound evenly and fully?
- Does the bobbin sit correctly in the bobbin case or compartment?
- Is the bobbin case inserted all the way?
A poorly wound bobbin or incorrectly inserted bobbin case will cause tension problems that no upper-thread adjustment can fix.
Step 7: Bobbin Case Tension Adjustment (Last Resort, Machine-Specific)
Only adjust bobbin case tension if you've cleaned the machine thoroughly, rethreaded correctly, adjusted the upper-thread dial, the problem persists, and your machine has a removable bobbin case.
Bobbin case tension is controlled by a small screw on the side of the case. This screw is extremely sensitive. A quarter-turn can make a big difference.
For front-loading machines with a removable bobbin case:
- Remove the bobbin case
- Locate the small tension spring screw on the side of the case
- Turn the screw clockwise (very slightly, one-eighth turn) to tighten bobbin tension if you see upper-thread loops on the bottom
- Turn counterclockwise (very slightly) to loosen if you see bobbin-thread loops on top
- Reinsert the case and test on scrap fabric
For top-loading and drop-in machines:
- Do not attempt to adjust bobbin tension unless your manual explicitly instructs you to do so
- If bobbin tension is the problem, seek professional service
If you're uncomfortable with this step, stop and seek professional service.
Common Mistakes to Avoid
Don't adjust tension when your presser foot is down.
Don't make large tension dial jumps. Go one number at a time.
Don't assume tension is the problem without checking threading first.
Don't use old or damaged thread.
Don't ignore a bent or sticky tension dial.
Don't forget to write down what setting works.
When to Stop Troubleshooting and Seek Repair
If you've worked through every step on this list and your tension still won't balance, your machine may have a mechanical problem that needs professional service.
Signs it's time to call a technician:
- The tension dial won't turn or feels stuck
- Tension discs are visibly damaged or corroded
- Thread breaks constantly even with new thread
Nebraska Quilt Company offers certified machine repair and maintenance. Our technicians can diagnose problems that go beyond simple tension adjustments and get your machine running smoothly again.
Don't keep fighting a machine that needs repair. Professional service is faster than replacing a machine.
Frequently Asked Questions
How do I tell if sewing machine tension is correct?
Balanced stitches appear identical on both the upper and lower fabric layers. The needle thread and bobbin thread should interlock in the middle of the fabric. Test on scrap fabric using the same thread and fabric weight as your project. If stitches look even with no loops or puckering, tension is correct. If the upper thread shows on the underside or bobbin thread loops on top, adjustment is needed.
Why is my thread looping underneath my sewing machine?
Thread looping underneath usually means upper-thread tension is too loose. Common causes include incorrect threading, the presser foot being down during threading, thread caught in guides, or a spool placed incorrectly. Always raise the presser foot before threading to open the tension discs. Check that thread sits properly in all guides and the spool isn't snagged. If threading is correct, gradually tighten the tension dial in small increments and test on scrap fabric.
Should I adjust the upper or bobbin tension first?
Adjust upper-thread tension first. Most tension problems stem from upper-thread issues like incorrect threading or presser-foot position. Only adjust bobbin tension if upper-thread adjustment doesn't solve the problem. Bobbin tension adjustments are more delicate and rarely needed. When testing, use the same thread type and weight throughout, and always test on scrap fabric before sewing your project.
What tension settings should I use for quilting?
Quilting typically requires slightly looser upper-thread tension than regular sewing because of the thicker thread and multiple fabric layers. Start with your machine's default tension setting and test on scrap fabric using your quilting thread and batting. Balanced stitches should show equal thread on both sides. Fine-tune by making quarter-turn adjustments to the tension dial. Heavier threads may need looser settings; always test before quilting your project.
Tension problems are frustrating, but most are fixable at home with patience and the right approach. Start with threading and work your way through the checklist before touching the dial. Test on scrap fabric. Make small adjustments. Keep notes. If nothing works, reach out to a certified technician. At Nebraska Quilt Company, we're here to help you keep your machine in top shape so you can focus on what matters: creating beautiful quilts.